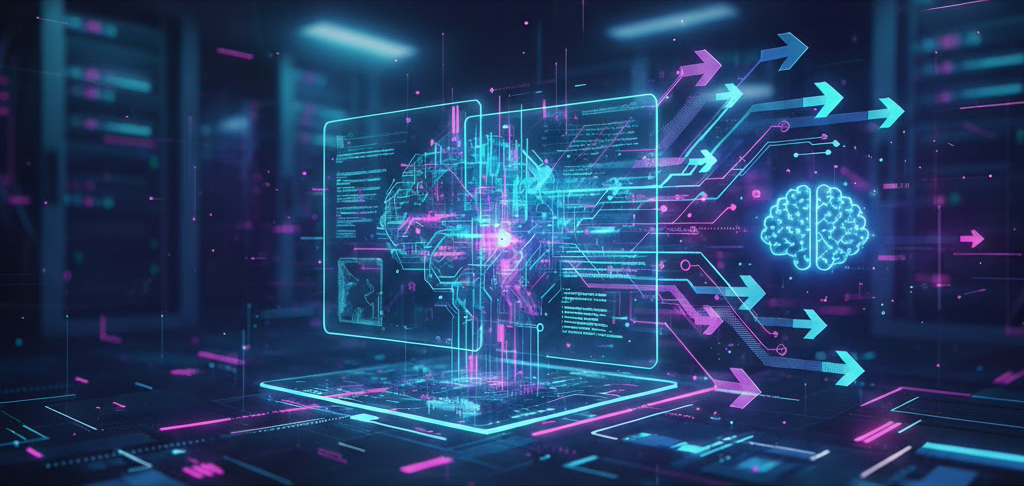
Torrent Information
 

How do I create a new torrent (share a file I have with others)?

Sharing files that you have with others is relatively easy with BitTorrent, but a little extra work is required compared to marking a directory as "shared" as with some other file sharing applications. There are essentially three elements necessary to sharing a file with BitTorrent:

1. The tracker, which coordinates connections among the peers. Bandwidth required is very moderate compared to the size of the files being shared.
2. The web server, which stores and serves the .torrent file. This is usually a quite small file, and is only requested once by each peer before initiating the transfer. The web server also serves to index and organize the torrents, since there is no built-in search capability in the BitTorrent protocol -- existing web techniques are instead used.
3. At least one seeder. This is the only element of the three that contains any of the file's actual contents. The seeder is almost always an end-user's desktop machine, rather than a dedicated server machine.

In earlier periods of BitTorrent, the process was somewhat more difficult because frequently you had to run your own tracker (and possibly web server) in addition to the seeder. Recently, however, torrent communities have sprouted which take care of many of the details of running a tracker and distributing the .torrent metadata file. For most purposes, using one of these communities is the quickest and easiest way to share data.

For the purposes of this part of the FAQ, we will assume you already have a tracker and web server, or access to them. Most of the sites listed in the links section run trackers and web servers that you are welcome to use. The rule of thumb here is to never create a torrent for a tracker which you do not have permission to use. In most cases that simply means that if you intend to use a tracker, you should also post your .torrent file to the website associated with the tracker, so that the whole community can benefit.

If you still desire to run a tracker or web server, see the following questions on running a tracker and configuring a web server.

Below are the steps to create and distribute the .torrent file, and begin the seeding.

1. Decide what you want to share. A torrent can contain either a single file, or a directory of many files. This is often quite convenient, since it avoids the step of creating an archive (.zip, .rar, etc.) if you need to store multiple files. For example, if you are sharing a 2-CD movie, put both of the files in a directory and create a torrent for that, rather than zipping the files and then creating a torrent for the single archive file.

IMPORTANT NOTE! Despite what I would call common sense and courtesy, I see people doing stupid things at this point all the time! For example, if the file you are sharing was originally posted to Usenet and came in a number of parts (.RAR, .R00, .R01), do not put those parts in an archive and then create a torrent of that. Most media files are already compressed, and rar-ing or zip-ing them just adds an additional step for everyone that receives the files. And for the love of $DEITY, do not include the parity files in your torrent! In summary, if the end product you are sharing is an .AVI file, create a torrent for that. This makes it easier for people to hold on to the original form of the torrent, and this tends to lead to it being shared longer. If you distribute your AVI file as an RAR containing 33 parts, which itself contains a ZIP, then people will trudge through the processing of the files to get the AVI, and then most likely delete the original since it's in a form that is useless to them. Therefore, they cannot (re-)seed the torrent since they've lost the original format. Finally, you do your part to put an end to the neverending stream of "How do I open .R00 files?" questions. (end opinionated rant)
2. Run maketorrent. (See this section of the FAQ if you haven't installed it.) If you are sharing a single file, click the (file) button, otherwise click the (dir) button. In either case a file dialog will appear, and you should select the file/directory that you wish to share.
3. Enter the tracker's announce url in the space provided, or use the drop-down list to select from one of a common list of trackers. Remember, if you use a site's tracker when creating a .torrent file, plan to upload/post the file to that community. You can also add a comment, but it's optional.
4. Select the piece size, or just accept the default value of (auto). In general, the smaller the piece size, the more efficient the BitTorrent download will be, but will result in a larger .torrent file. 256 kB seems to be the most common piece size in use these days, but you can experiment with other settings if you want. Avoid very large piece sizes for small files; likewise avoid small piece sizes for very large files.
5. Click create torrent to begin the process of creating the file. You can then select if you want to create a single .torrent for all the files in the directory, or a number of separate .torrents. Most of the time you want a single .torrent for the whole folder, unless you know what you're doing. When finished, you should find a newly created .torrent file in the same directory as the file/directory you selected to share.
6. Upload this .torrent file to a web server. Usually this means going to the web page of the site whose tracker you used and clicking the "Upload torrent" link. The procedure varies from site to site, but it's usually always explained in a FAQ link or forum posting. If you are running your own web server (and have configured it appropriately) then upload the file to your server's public web space, or whatever method you use to put files on your server.
7. Finally, you must seed the file. Until this step, nothing but metadata has been transferred. Seeding is necessary to actually transmit your file to others. There are several ways to do this, but the simplest is to use your ordinary BitTorrent client just as you would with any other file. Navigate to the page on the web server where your .torrent is posted, click the link, and when the BitTorrent client starts be sure to select the same file/ directory that you used in maketorrent in step 2 above. The client should check the files and verify that they are complete, and then connect to the tracker and begin seeding. There are several important points about this step:

* Be sure the machine that you are seeding from can accept incoming network connections on the ports BitTorrent is using. Usually this means configuring port forwarding if you are in a NAT environment. See this section for details.
* If you are running the tracker on the same machine as the seeding client, and you are in a NAT environment, you must add the "--ip address" parameter to the client command line, where address is the publicly-visible IP address of the machine. For example, your machine might be on an internal network, sharing a DSL or cable modem connection behind a router/gateway. In this case it probably has an internal (unroutable) IP address such as 192.168.x.x or 10.x.x.x. It is necessary to tell the tracker your true public IP address instead of this internal address. If you're not sure what that is, try a site such as this one. For details on how to add or change command line parameters in Windows, see see this section of the FAQ. Finally, remember that in a lot of cases you will have a dynamic IP address (one that is assigned to you each time you connect), and if this is true you will have to ensure that you are using the correct one each time. Again, this process applies ONLY if you are seeding and running a tracker on the same machine, and you have a NAT setup.
* Make sure to leave the seeding client open long enough. The exact amount of time depends on a number of factors. If the file you are seeding is very popular, then you can often seed just long enough to get several distributed copies into the swarm, and then disconnect. If the torrent is sufficiently "healthy," the seeder leaving will have no adverse effects, since there are enough distributed copies of the file to support the swarm. If the file has fewer interests, you will generally have to seed longer. A good policy is to check back later on the tracker's stats page or in the forums and make sure that no one has been left stranded.
* If you want to seed a number of different torrents, it is often cumbersome to open a number of copies of the GUI client. In this situation the btlaunchmany.py version of the client is very useful. See this section below for details on its use.

How do I run a tracker?

There are several options for running a tracker, as explained below. However before going to the trouble of installing and running your own tracker, you should first consider whether you actually need to run a tracker in the first place. There are many public BitTorrent trackers out there at the moment, see the links section for a good list. Unless you have some compelling reason why you want to run your own tracker, it's probably best to use someone else's. Hosting a tracker on a workstation-type machine with a dynamic IP address is possible but can be very tricky. In short, if you're not sure whether you need to run a tracker or not, then you don't need to.

Before starting on your tracker, make sure you've read and understand the section on making and uploading a torrent, especially the part about the need for the --ip parameter for seeding machines on the same side of a NAT gateway as the tracker.

Below are the common ways to run a tracker:

* Run the Python tracker. This is relatively straightforward:

1. Install Python if you don't already have it on your system. Windows users should follow this link to download the Python 2.2.3 installer from python.org. If you use Linux (or BSD, OS X) you will want to consult your distribution's package management system. There are some details on this in the section above.
2. Get the Python source code of BitTorrent. Note: A lot of changes have been made to the source since 3.2.1 was released, I strongly recommend that you get the latest sources from CVS if you want to run the tracker. To check out the source from CVS, issue the following command, assuming that you have a CVS client installed:

cvs -d:pserver:[email protected]:/cvsroot/bittorrent co BitTorrent

This will create a BitTorrent directory under the current working directory. Note: Sourceforge's CVS server has been very flaky recently, presumably due to overload. If you find that you cannot get the above command to work, i.e. you get "Connection reset by peer" or some sort of timeout error, you can try this alternative server:

cvs -d:pserver:[email protected]:80/cvsroot/bittorrent co BitTorrent

If you need help installing a CVS client on your system, consult the Sourceforge documentation for Windows users here as well as the general CVS documentation here. Note that you can also access the sources through WebCVS.
3. Page through the README.txt file for general instructions on how the tracker works. Essentially, you change to the directory that contains the bttrack.py file and issue a command such as:

python bttrack.py --port 6969 --dfile dstate --logfile tracker.log

Note that if this command is successful you won't see anything on the screen at all -- the tracker will remain open until you kill it, so you may want to put the command in a batch file for easy startup. To check your tracker's operation, connect to the machine running the tracker, i.e. by loading "http://machine-name:6969/" into your browser. If successfull you should see a status page in your browser.

Your tracker's announce URL will be "http://machine-name:6969/announce". This is what should be entered in the appropriate field when creating a .torrent for your tracker.

4. You should review the command line parameters and make any changes as appropriate. Note that the "--logfile" parameter is new in CVS and not present in 3.2.1. If you must use the 3.2.1 sources, you will want to redirect the log messages on stdout to a file, e.g. by appending ">> tracker.log" to your command line. You can also run "python bttrack.py to get a list of command line parameters. Some parameters that might be of interest are:

--nat_check n
If 1 (default), don't allow users behind NAT gateways use the tracker. You probably want to set this to 0 for a general-access site.
--allowed_dir dir
Use this to restrict the files which your tracker will track. This parameter specifies a directory name, and it will only track torrents that exist in this directory. If this parameter is present you must somehow place the .torrent file in the specified directory before the tracker will accept it.
--show_names n
If set to 1, the tracker will show filenames of torrents that it knows about in its allowed_dir, instead of just showing info_hash's on its status page.

See the command line section of the FAQ for a complete list of command line parameters.
* As an alternative to the Python tracker, you can try BNBT which is a tracker written in C++. It is slightly easier to install since it comes with precompiled binaries for Windows, and is relatively easy to build with g++ under Linux/OS X. BNBT has more advanced stats-pages, but its configuration is very similar to the Python tracker. Refer to the home page for downloads and manuals.
* You can also try the TrackPack, which combined BNBT with an easy to use installer for Windows. With this combination you can have a tracker up and running very quickly. You can read more about the TrackPak and how to use it at Trinity's site and the forums at Filesoup.com.
* If you have a web server capable of PHP and MySQL, there are a couple of free (GPL) tracker implementations. One is PHPBTTracker, another is bytemonsoon.com. Both of these solutions run integrate the tracker with the web server, and offer quite extensive stats. Refer to the PHP source for installation details.

How do I configure a web server for .torrent files?

You must associate files ending in .torrent with the Content-Type application/x-bittorrent. For Apache, you should add the line:

AddType application/x-bittorrent .torrent

to your httpd.conf configuration file. If you cannot modify the main httpd.conf file (such as in the case of a shared or virtual hosting scenario), you can also put the above AddType directive in a .htaccess file. This presumes that the server's administrator has enabled this ability with the AllowOverride FileInfo directive. Also note that settings in a .htaccess file only apply to the directory containing the file, so make sure this is the directory that will contain the .torrent files.

Alternatively, you can add the line:

application/x-bittorrent .torrent

to your mime.types file, which is used if the TypesConfig directive is present in httpd.conf.

To add MIME types with Microsoft's IIS web server:

1. Right-click the Web site and choose Properties.
2. Select the HTTP Headers tab.
3. In the MIME Map box, click File Types, and then click New Type.
4. Enter the extension ".torrent" and the MIME type "application/x-bittorrent" in the appropriate boxes.
5. Select OK to close all the dialogs.

If you cannot configure the application/x-bittorrent type, you could place the .torrent files in an archive (.zip, .rar, etc.) and serve that instead. Doing so will forfeit the ability to click on a torrent link and automatically launch the BitTorrent client, however. The user must manually unpack the .torrent file and then launch it to start the transfer.